Sanding drywall can often feel like a daunting task, especially when thinking about the mess it can create. However, with the right approach, it’s possible to tackle this job while keeping your space clean and tidy. In this guide, we’ll explore practical methods to sand drywall without unleashing chaos in your home.
Gather the Right Tools
Having the right tools is essential to minimize mess. Ensure you have a dustless sander, fine-grit sanding sponge, or vacuum attachment ready for the job. These tools not only help in keeping the dust levels down but also make the sanding process more efficient. Investing in a high-quality dustless sander can significantly reduce the amount of airborne dust and is well worth considering for these jobs.
Besides the main sanding tools, do not forget essentials like safety goggles and a dust mask. Protecting yourself is just as important as doing the job itself. Not only does this safeguard your health, but it also ensures you are comfortable and focused while working.
Prepare Your Space
Before you start sanding, cover floors and furniture with plastic sheets or drop cloths. Seal off other areas with painter’s tape to contain the dust. Using a quality painter’s tape will ensure no dust sneaks into unwanted spaces, thus making the cleanup much simpler later on.
It’s crucial to remove small items from the room where the sanding will take place. This reduces the surface area where dust can settle, and it makes it easier to clean up afterward. Additionally, consider turning off air conditioning and heating systems to prevent dust from spreading throughout the home.
For additional dust control, you might want to try creating a dust barrier. Utilize plastic sheeting to section off the area, creating a ‘work zone’. This keeps the dust contained and reduces the cleanup time after your project is complete.
Use a Dustless Sander
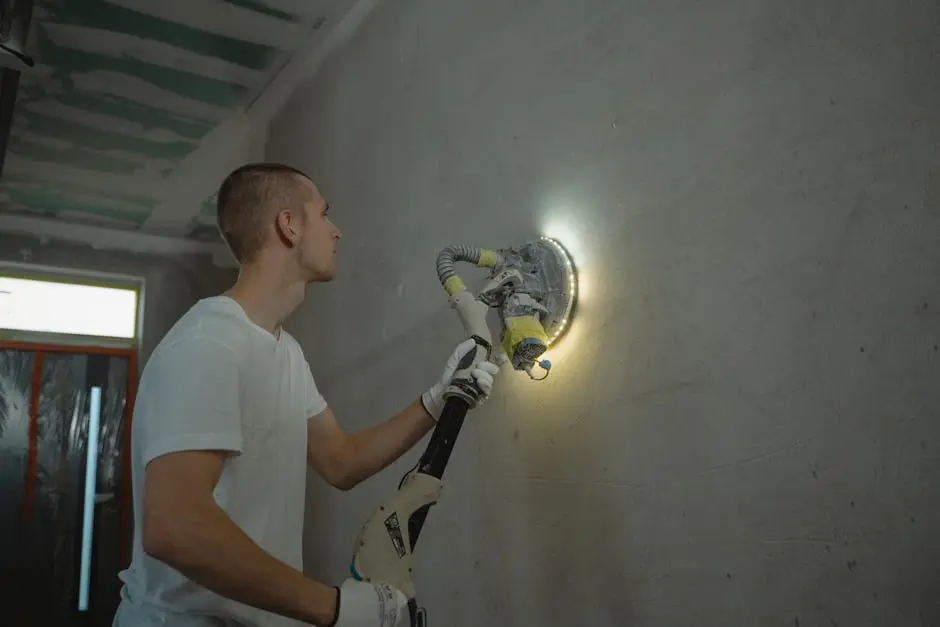
A dustless sander is your best friend for a clean job. These sanders come equipped with a suction system that captures dust as you work. This type of equipment is highly recommended for anyone looking to minimize cleanup and ensure that sanding does not become a reason for headaches later on.
These practical tools are designed with an attachment that connects directly to a vacuum. This means as soon as the dust is created, it’s immediately sucked away, making your work environment much cleaner. This not only protects your health by reducing airborne dust but also lessens your workload when it comes to cleaning up afterwards.
Sanding Technique
Sand lightly and evenly using a circular motion. Avoid applying too much pressure to prevent damaging the drywall surface and creating more dust than necessary. This technique helps in achieving a smooth finish without the need for extensive clean-up.
Starting with the right grit size is crucial. Begin with a medium-grit sandpaper to remove the larger imperfections, and finish with a fine grit to smooth the surface perfectly. This approach ensures minimal dust generation.
Work in small areas at a time. This allows you more control over the process and ensures each section receives adequate attention, preventing a buildup of dust across wide areas.
Cleaning Up
Once you’ve finished sanding, use a damp cloth to wipe down surfaces and a vacuum to pick up any remaining dust, ensuring your space returns to a pristine condition.
Make sure to change the vacuum filter after cleaning up dry wall dust to maintain its efficiency for future use. Regular maintenance of your cleaning tools can greatly aid in reducing work time and effort.
For an effective final cleaning, consider using a HEPA filter vacuum. This helps to trap even the finest dust particles, leaving your space spotless and safe for inhabitants. Your interior environment will feel fresh and clean afterwards.
Keep Your Space Tidy While Creating a Perfectly Smooth Surface
With the right tools and preparation, drywall sanding can be a manageable task that doesn’t leave your space in disarray. By following these steps, you can achieve a smooth finish without the hassle of cleaning up a huge mess afterward. Happy sanding!